
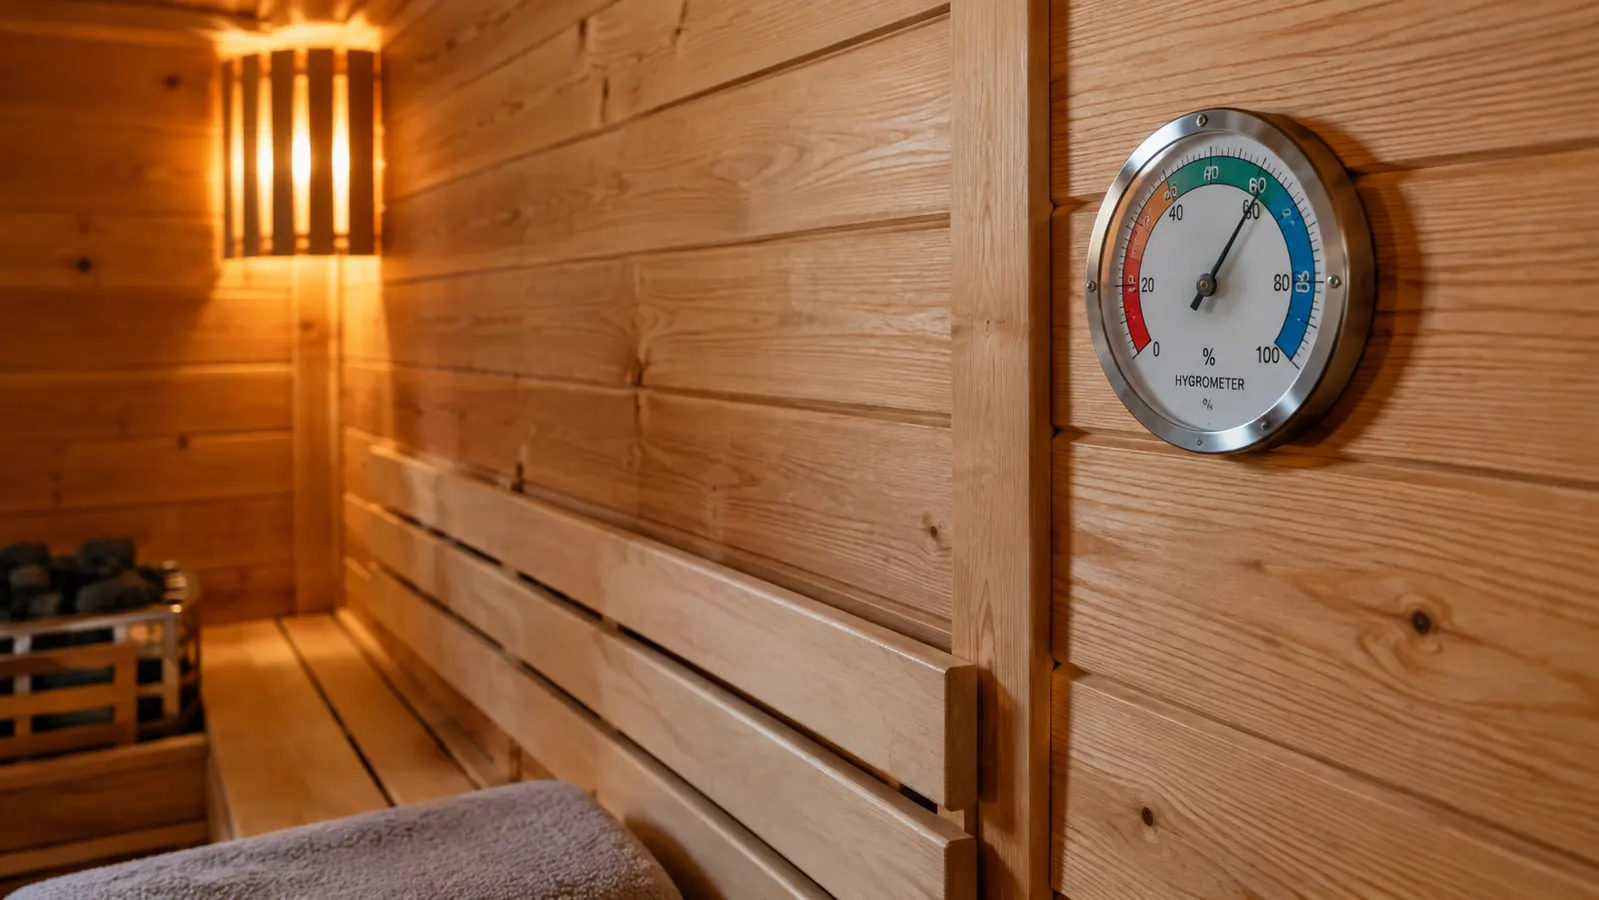
The first time I used a sauna at a friend's house, I had no idea what the little dial on the wall was telling me. I just knew the air felt good and my knees felt better afterward. It took me years, and a lot of time in physical therapy clinics, to understand that temperature and humidity are two separate things that work together. If you are new to home saunas, or if you have been using one for a while and still guess at the settings, this guide is for you. I am going to walk through how to read a sauna hygrometer, how to use what it tells you, and what to do when the numbers do not match how you feel.
The tool I keep in my own basement sauna corner is the Defull Stainless Steel Sauna Hygrometer Thermometer. It is a simple mechanical dial, not a digital gadget, and that is exactly why I trust it. In this guide I will show you how to read it, how to place it, and how to use it to find your own comfortable range.
See the Defull Sauna Hygrometer on Amazon
If you want to follow along with the same tool I use, check the current price on Amazon. It is a straightforward mechanical thermometer and hygrometer in one, with a large dial that is easy to read from the bench.
Amazon Check Today's Price on Amazon →Step 1: Understand What the Two Scales Are Telling You
A sauna hygrometer is actually two instruments in one housing. The thermometer side measures air temperature in degrees Fahrenheit. The hygrometer side measures relative humidity, which is the amount of moisture in the air compared to how much the air can hold at that temperature. Warm air holds more moisture than cool air, which is why a sauna can feel dry even when there is steam in the air.
The Defull model has a color-coded dial that makes this easier. The temperature scale runs from about 70 to 250 degrees Fahrenheit, and the humidity scale runs from 0 to 100 percent. The color zones on the dial are there to help you see at a glance whether you are in a typical sauna range. You do not need to memorize numbers. You just need to know which needle is which and what the colored band is trying to tell you.
The most common mistake I see is people treating the humidity reading like a thermostat. They see a high percentage and think the sauna is too wet, or a low percentage and think something is broken. Humidity in a sauna changes quickly when you pour water on the rocks, and it settles back down as the steam dissipates. A single reading is a snapshot, not a verdict. The first time I poured a ladle of water on the rocks in my own sauna, I watched the humidity needle climb from about 12 percent to nearly 30 percent in under a minute, then drift back down as the steam settled. That one little experiment taught me more than any chart: the needle moves fast, and a high reading right after a pour is not a problem, it is just the sauna doing its job. Once you have seen that happen a few times, you stop worrying about the number and start using it.
Step 2: Mount It at the Right Height
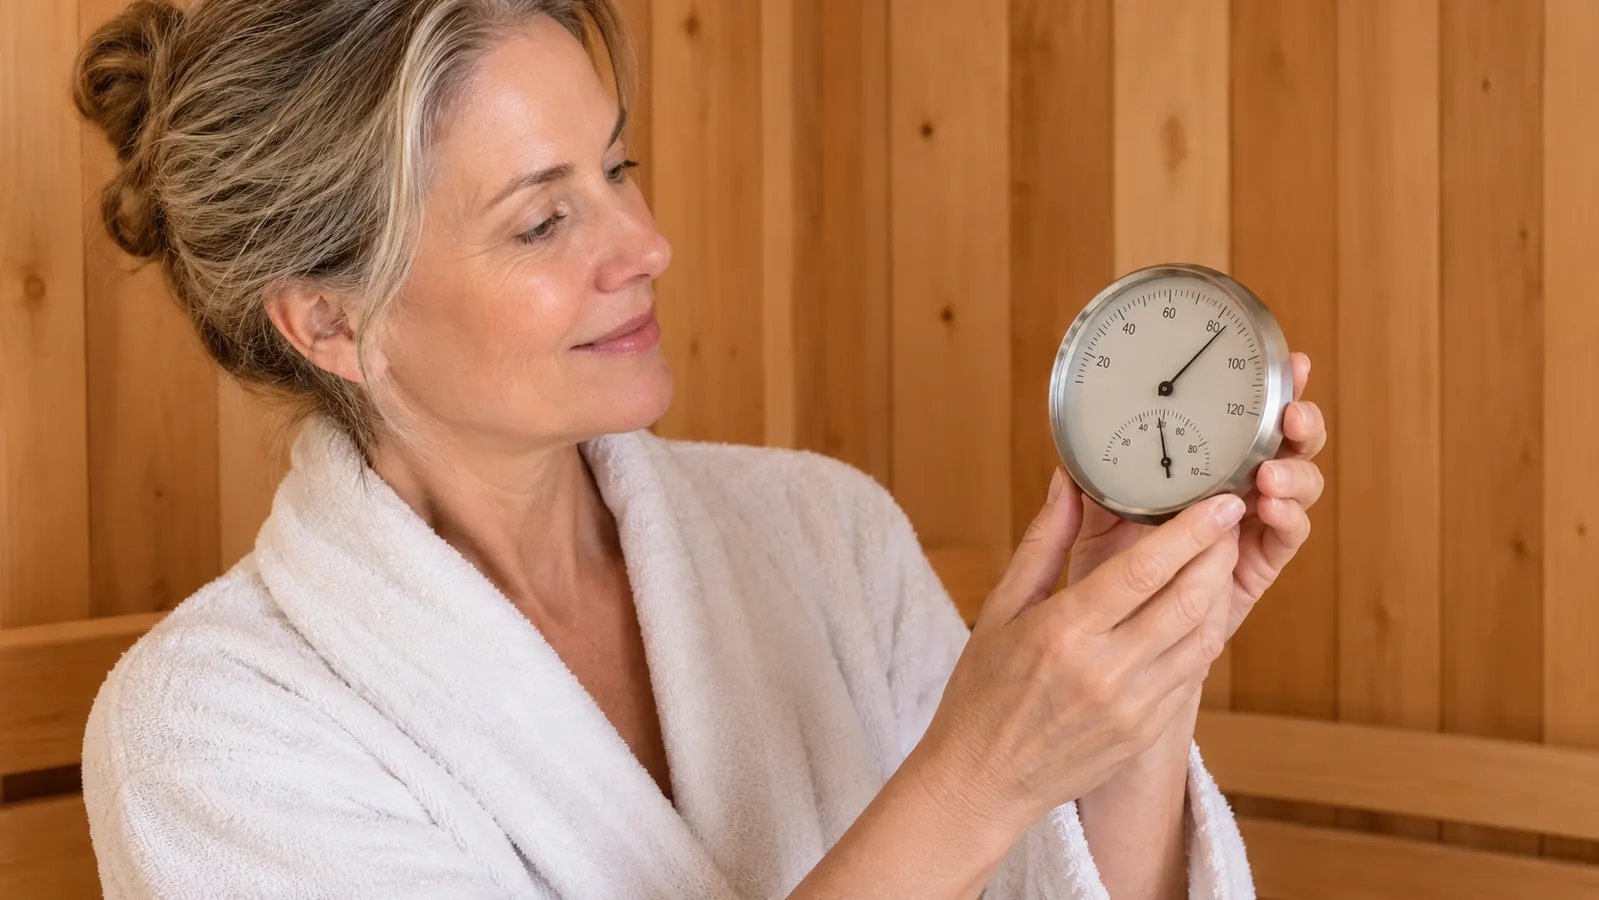
Where you mount the hygrometer changes what it reads. Heat rises, so the air near the ceiling is hotter and drier than the air near the floor. If you mount the unit near the ceiling, you will see a higher temperature and a lower relative humidity. If you mount it near the floor, you will see the opposite. Neither is wrong, but you need to know which one you are looking at.
I recommend mounting it at seated head height, roughly where your head is when you are sitting on the upper bench. That is the air you are actually breathing and the temperature your skin is actually feeling. In my basement setup, that means the dial sits about five feet off the floor, on the wall beside the bench rather than directly above the heater. I learned this the hard way. The first winter I hung the unit high on the wall near the ceiling, it read 198 degrees while the bench where I sat felt closer to 160. I trusted the dial, cut the session short, and spent the rest of the evening convinced my heater was running away. When I moved the unit down to bench height, it read 163 degrees, which matched how the air actually felt. The heater had been fine all along. The mounting spot was the problem.
The Defull unit has a large five-inch face, which I appreciate because I do not like putting on reading glasses in a hot room. The mounting hole in the back lets you hang it on a small nail or screw. Keep it away from direct contact with the heater and away from a window or cold wall, because those surfaces will skew the reading.
Step 3: Learn Your Comfort Zone, Not the Ideal Number
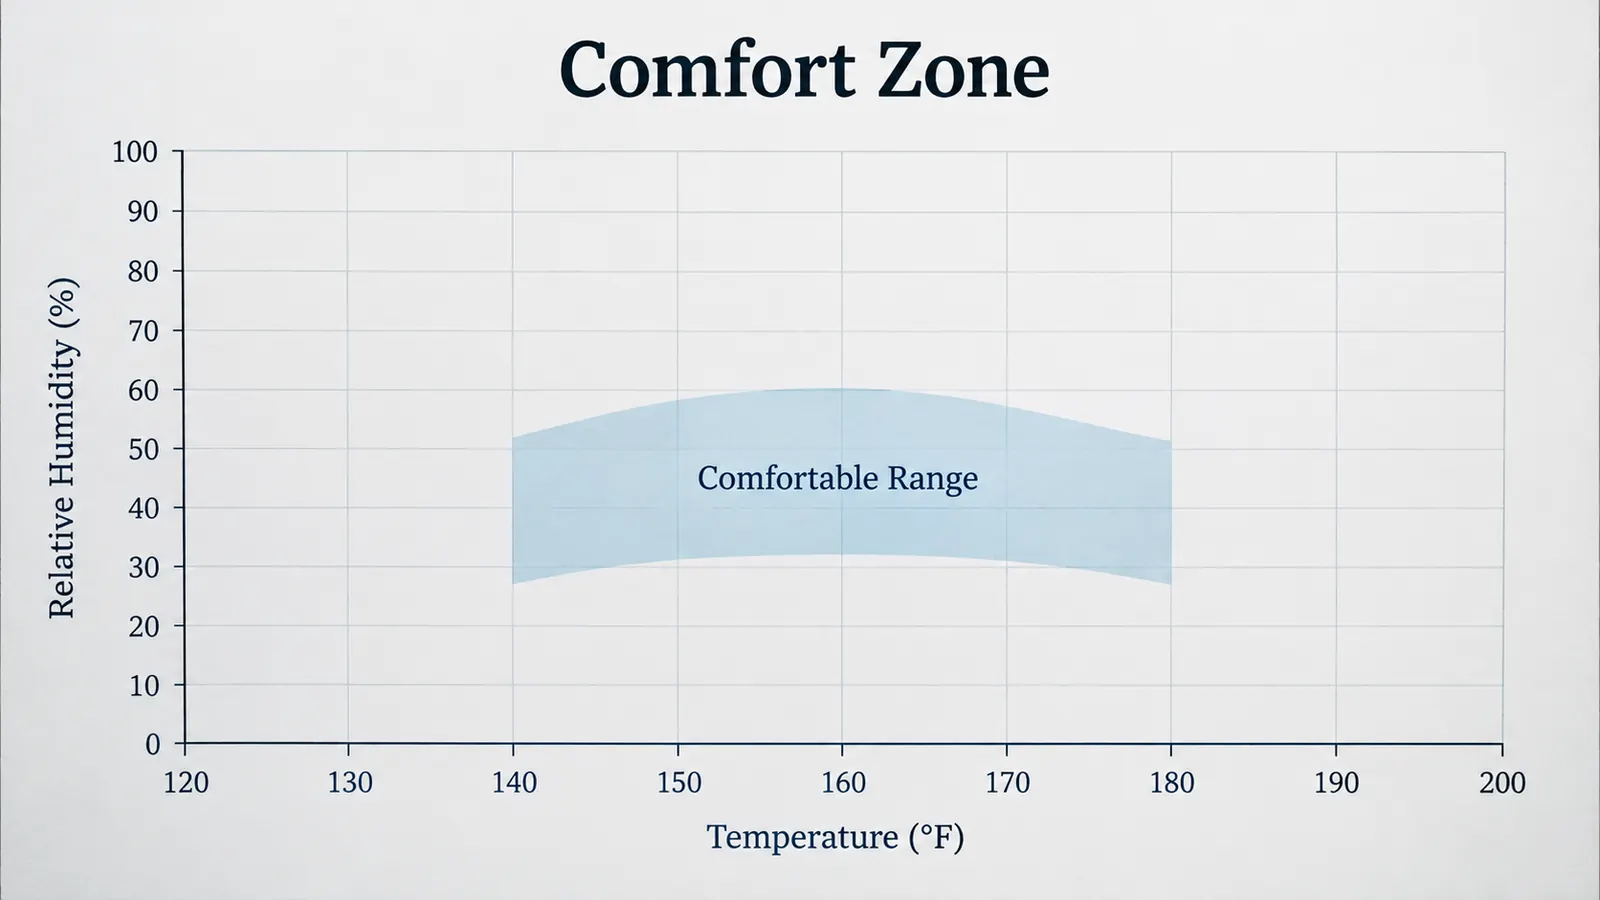
There is a lot of talk online about the perfect sauna temperature. The truth is that comfort is personal, and it depends on how long you have been using saunas, how hydrated you are, and what your body is used to. In my experience, most people settle into a range somewhere around 150 to 175 degrees Fahrenheit with relative humidity somewhere between 10 and 30 percent. That is a starting point, not a rule.
The color-coded dial on the Defull helps with this. The green zone on the temperature scale points you to a typical comfortable range, and the humidity scale has a similar marker. I tell people to use the colored band as a target the way I used to use a heart rate zone chart with patients: it gives you a frame, and then you adjust based on how you feel.
Start with a cooler session, around 140 to 150 degrees, and short sessions of five to ten minutes. Pay attention to how your body responds. Over a few weeks, you can gradually work up to a temperature and a session length that feels sustainable. The hygrometer is there to give you a consistent reference point so you can repeat what felt good. My own progression went like this: the first week I stayed at 145 degrees for eight minutes and felt cold when I stepped out. The second week I tried 155 for ten minutes and that felt right. By the fourth week I had settled at 160 to 165 for twelve minutes, and that is where I have stayed for months. Nobody handed me those numbers. I found them by writing down each session and moving in small steps.
Step 4: Use the Humidity Reading to Adjust the Experience
Humidity changes how a sauna feels more than temperature does. Dry heat at 170 degrees feels very different from humid heat at 170 degrees. When you pour a ladle of water over the rocks, the humidity spikes and the air feels heavier on your skin. Some people love that sensation. Others find it overwhelming. The hygrometer lets you see what is happening instead of guessing.
I use the humidity needle as a guide for how much water to add. If the reading is below 10 percent and the air feels harsh on my throat, I add a small ladle of water and watch the needle move. If it climbs above 30 percent and the air starts to feel thick, I stop adding water and let the sauna dry out a bit. Over time, you will learn how many ladles it takes to move the needle in your particular sauna. One evening I got curious and added three ladles in a row. The needle climbed from 11 percent to 34 percent, and the air went from pleasant to heavy in about four minutes. I learned that in my sauna, one ladle is plenty and two is the absolute ceiling. That is the kind of information you can only get by watching the dial while you experiment. Now I know exactly what my sauna is going to do before I pour, and that predictability is what makes a session relaxing.
One caution from my physical therapy days: very high humidity combined with high heat puts more stress on the cardiovascular system. If you have high blood pressure, a heart condition, or any concern about how your body handles heat, check with your doctor before you start experimenting with steam. I am not a doctor, and I do not give medical advice. I just know that slow and steady is a better approach than dramatic.
Step 5: Check the Reading Against How You Feel
The hygrometer is a tool, not a boss. The numbers are useful because they give you a consistent way to describe your sessions and repeat what works. But the final judge is always how you feel during and after the sauna. If the dial says 160 degrees and 20 percent humidity and you feel lightheaded, the session is too much for today. Get out, cool down, and try a shorter or cooler session next time.
I keep a small notebook in the basement next to the sauna. I write down the date, the temperature reading, the humidity reading, how long I stayed in, and one sentence about how I felt. After a few weeks, patterns show up. I know now that my own sweet spot is around 160 degrees with humidity around 15 percent, and that I do better with two shorter sessions than one long one. You cannot see patterns like that if you never write anything down. A typical entry reads: January 12, 162 degrees, 14 percent humidity, twelve minutes, knees felt looser than usual on the stairs afterward. That last part is the one I actually use. The temperature and humidity tell me what I did; the sentence tells me whether it worked. After a month, I could look back and see that the sessions where I kept humidity under 20 percent were the ones where I felt best the next morning. That is the kind of record keeping that turns a gadget into a tool.
The Defull hygrometer is accurate enough for this kind of tracking. It is a mechanical unit, so it responds a little more slowly than a digital sensor, and it is not laboratory equipment. For home sauna use, that is fine. You are looking for consistency and direction, not scientific precision.
What Else Helps
A hygrometer is one small piece of a home sauna routine. A few other things have made a bigger difference for me than any single gadget. A good thermometer you can read from the bench is essential, which is why the Defull is my daily driver. A towel to sit on, a bucket of cool water for splashing your face, and a timer you can see from inside the sauna all help you keep sessions safe and comfortable.
Hydration matters more than any accessory. I drink a glass of water before I go in and keep another one nearby for after. I also keep my sessions shorter in the winter, when the contrast between the hot sauna and the cold Minnesota air is sharper. And I always cool down gradually, stepping out into the basement rather than straight into a cold shower.
The numbers on the dial are only useful if they match the way you feel. I write down every session, and the patterns taught me more than any single reading ever did.
What I'd Tell You If We Were Sitting at My Kitchen Table
If you came over to my house and asked whether you need a sauna hygrometer, I would say yes, but not because it will transform your health. I would say yes because it gives you a way to learn your own routine with a little less guessing. The Defull model is inexpensive, simple, and easy to read, which is everything I want in a basement sauna tool.
Start slow, keep a record, and let the dial be a guide rather than a rule. And if you are thinking about buying one, the current price on Amazon is worth checking, because the color-coded dial makes it one of the easiest units I have used for teaching myself and others how to read a sauna.
Ready to Stop Guessing at Your Sauna Sessions?
The Defull Stainless Steel Sauna Hygrometer Thermometer is the tool I reach for every time I head to the basement. Check today's price on Amazon and see if it fits your setup.
Amazon Check Today's Price on Amazon →